7 Tips How to Fix a Crack in a Marble Vanity Top?

Time:2026-10-21 Author:Sophia
0%

A cracked marble vanity top can turn a calm bathroom into a daily worry. Water may enter the fracture, stains may spread, and loose edges can worsen under pressure. Learning How to fix a crack in a marble vanity top requires patience, suitable materials, and an honest assessment of the damage. A hairline surface crack may respond well to cleaning, drying, and color-matched marble epoxy. A deep crack, unstable section, or damaged support usually needs a qualified stone restoration professional.

This guide presents seven practical tips based on common repair methods used for natural stone surfaces. You will learn how to inspect the crack, prepare the marble, choose a compatible filler, and blend the repaired area with care. Small details matter. Dust trapped in the opening can weaken the bond. Excess adhesive can leave a raised, glossy patch beside the original finish. That happened in an early repair I observed, and correcting it required careful sanding and resealing. The result was improved, but not invisible.

Marble varies in color, veining, porosity, and finish. Therefore, a product that works on one vanity may look unsuitable on another. Test the repair material beneath the basin or on a spare marble sample. Protect nearby fixtures, wear appropriate eye and hand protection, and follow the manufacturer’s curing instructions. Do not rush the final polishing stage. Sometimes, calling a specialist is the most reliable repair. A strong result should restore function, resist moisture, and respect the stone’s natural appearance.
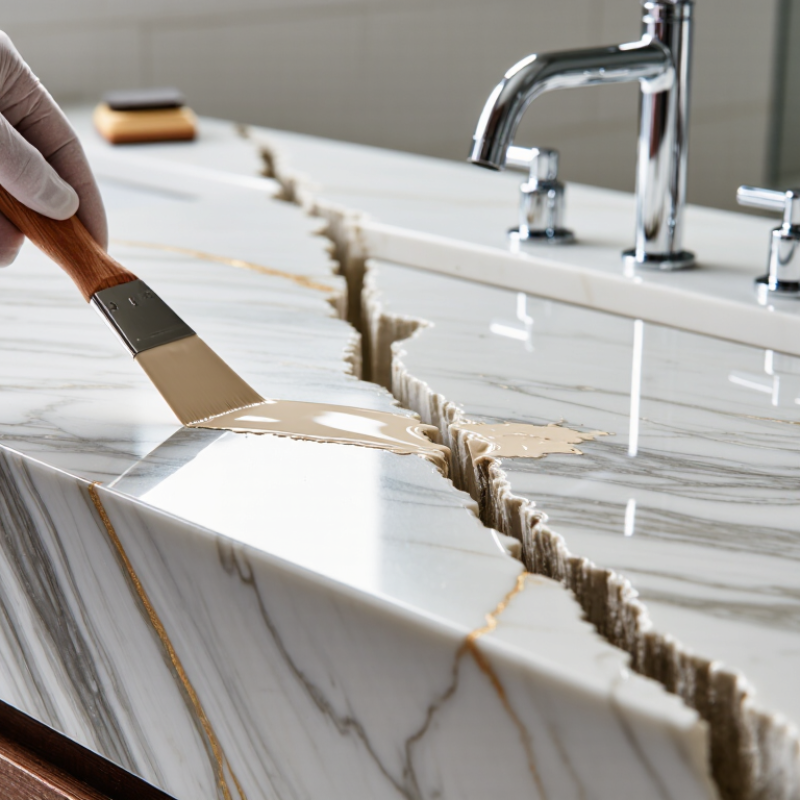
7 Tips How to Fix a Crack in a Marble Vanity Top?

Assess the Marble Crack and Identify Its Likely Cause

Before repairing a marble vanity top, inspect the crack under bright, angled light. Clean the surface with a pH-neutral stone cleaner, then dry it completely. Note the crack’s length, width, direction, and exact location. A thin line near the sink opening may indicate stress around a cutout. A crack crossing the basin area can suggest movement beneath the stone.

Run a fingernail gently across the line. If it catches, the damage may be deeper than a surface fissure. Look underneath the vanity, if access allows. Loose brackets, missing support, swollen wood, or a sagging cabinet can place continuous pressure on the marble. Check for water stains too. Moisture may weaken the substrate and enlarge an existing fracture. Heat alone rarely explains a structural crack, but sudden temperature changes can contribute.

Impact marks often appear as small chips or radiating lines. By contrast, a long, clean crack may point to installation stress, settling, or inadequate support. I once underestimated a hairline crack because it looked cosmetic from above. The underside showed movement near the plumbing cutout. That mistake matters. Do not force the crack open or sand it before identifying its cause. Photograph both sides, measure the gap, and watch for changes over several days. If the marble shifts, the cabinet feels unstable, or the crack reaches an edge, a qualified stone professional should assess the support before any filler is applied.

Assess the Marble Crack and Identify Its Likely Cause

Compare the physical expansion or movement clues below when inspecting a cracked marble vanity top. These figures are reference values, not probabilities of failure.

How to use the chart: A crack near a sink cutout may indicate stress concentration, while cracks near joints or walls may relate to installation movement. Moisture intrusion is especially important in cold environments because freezing water expands by approximately 9%. Thermal movement and concrete or adhesive shrinkage are smaller, but repeated movement can still contribute to cracking.

Reference values: water expansion during freezing is approximately 9%; calcite thermal expansion is approximately 4.6 μm/m·°C, equivalent to about 0.046% over a 100°C change; typical concrete drying shrinkage is approximately 0.03–0.08%.

Gather the Right Tools and Marble Repair Materials

7 Tips How to Fix a Crack in a Marble Vanity Top?

Gather the Right Tools and Marble Repair Materials

A durable marble repair begins with accurate inspection and suitable materials. Use a bright flashlight to trace the crack’s full length. A soft brush, pH-neutral cleaner, lint-free cloth, masking tape, and a plastic spreader help prepare the area. Keep a two-part stone epoxy, matching mineral pigment, and fine abrasive pads nearby. Choose a repair filler specifically compatible with natural stone. Ordinary household glue may yellow or shrink.

Safety equipment matters, even during a small repair. Wear chemical-resistant gloves, eye protection, and a properly fitted particulate respirator when sanding. OSHA’s Respirable Crystalline Silica Standard limits airborne silica exposure to 50 micrograms per cubic meter over an eight-hour shift. Marble composition varies, so dust control remains sensible. Use wet sanding or local extraction when practical. Provide fresh ventilation, but avoid blowing dust across the bathroom.

The surface must be clean, dry, and stable before filling. Natural Stone Institute guidance stresses compatibility testing and careful surface preparation for stone care work. Test the epoxy and pigment on a hidden edge first. Slight color differences can become obvious under vanity lighting. Apply thin layers rather than one thick bead. Remove excess material before it hardens. Do not rush the curing time. A repair can look finished while remaining weak underneath. That is an easy mistake to make. Inspect the crack again after curing, because movement or moisture may reveal a deeper structural problem.

Clean, Dry, and Prepare the Cracked Vanity Surface

7 Tips How to Fix a Crack in a Marble Vanity Top?

Clean, dry, and prepare the cracked vanity surface before choosing any filler. Remove soap film with a pH-neutral stone cleaner and a soft nylon pad. Avoid vinegar, bleach, and abrasive powders. They may dull the polished finish or enlarge weak edges. Wipe away residue with clean water, then dry the area completely. The U.S. Environmental Protection Agency recommends drying wet materials within 24 to 48 hours to reduce mold risk.

Inspect the crack under bright, angled light. Check whether it reaches the sink opening, backsplash, or vanity edge. Mark both ends with low-tack painter’s tape. This prevents the damage from disappearing beneath repair material. Use a plastic scraper, not a metal blade. A hair dryer on a low setting can help remove trapped moisture, but keep it moving. The Natural Stone Institute’s technical guidance emphasizes clean, dry stone before bonding or filling procedures.

Do not rush this stage. A slightly damp crack can cause poor adhesion, even when the filler looks smooth. If sanding becomes necessary, use wet methods and suitable respiratory protection. OSHA limits respirable crystalline silica exposure to 50 micrograms per cubic meter over an eight-hour period. That detail is easy to overlook. My practical caution is simple: if the crack flexes, feels hollow, or continues through the underside, surface preparation alone is not enough. Photograph the area before repair, because polished marble can hide movement until the damage returns.

7 Tips: How to Fix a Crack in a Marble Vanity Top — Clean, Dry, and Prepare the Cracked Vanity Surface

Tip Recommended Action Purpose Suggested Tools or Materials Typical Time Important Check
1 Inspect the crack and determine whether it is superficial or structural. A crack that passes through the slab, widens under light pressure, or reaches an edge may require professional assessment or replacement. Flashlight, ruler, non-stretching measuring tape, camera 10–15 minutes Stop if the vanity top moves, sinks, or has loose sections.
2 Remove dust, soap residue, cosmetics, and loose particles from the damaged area. Clean stone provides better contact for the repair filler and reduces the risk of trapped contamination. Soft cloth, pH-neutral stone cleaner, soft brush, clean water 5–10 minutes Avoid acidic cleaners, abrasive powders, and rough scouring pads.
3 Dry the crack, surrounding surface, and underside if accessible. Moisture can weaken adhesion, cloud some fillers, and prolong curing. Lint-free towels, fan, low-heat hair dryer 30–60 minutes The surface should feel dry and show no darkening from retained water.
4 Protect the basin, backsplash, cabinets, and nearby fixtures with masking materials. Masking prevents filler, dust, and sanding residue from staining or damaging adjacent surfaces. Painter’s tape, plastic film, kraft paper, gloves, safety glasses 10–15 minutes Leave only the crack and a small working area exposed.
5 Gently open or clean the crack only as needed to remove weak material. A clean, stable repair channel allows the filler to reach the full depth of the damage. Plastic pick, fine diamond hand pad, small vacuum or soft brush 5–15 minutes Do not force the crack wider or remove sound marble around it.
6 Choose a marble-compatible color-matched repair filler and perform a small test. Testing confirms color, texture, and compatibility before the visible repair is filled. Stone repair filler, mixing surface, disposable spatula, sample stone or hidden test area 15–20 minutes Follow the product’s mixing ratio, working time, and curing instructions.
7 Fill the crack, level the surface, allow full curing, and polish lightly if required. A controlled finish helps restore a smooth surface and minimizes visible repair lines. Repair filler, plastic razor, fine wet/dry abrasive pad, soft cloth Curing: 12–24 hours; finishing: 10–20 minutes Do not expose the repair to water, cleaners, or heavy use until fully cured.
Safety note: Wear eye protection and suitable gloves when cleaning, opening, filling, or sanding the crack. If the crack is spreading, affects the sink cutout, or indicates movement in the vanity structure, consult a qualified stone repair professional.

Fill, Level, and Blend the Repair Compound

7 Tips How to Fix a Crack in a Marble Vanity Top?

A clean repair begins with diagnosis. Hairline cracks may respond to filling, but movement or wide separation needs professional inspection. The 2024 U.S. Houzz & Home Study reports a median major bathroom renovation cost of about $35,000. Careful repair can help avoid unnecessary replacement. Wear eye protection, and keep the surface completely dry.

Tip 1: Clean the crack with a soft brush and pH-neutral cleaner. Remove dust without widening the opening. Tip 2: Choose a color-matched marble repair compound suitable for stone. Mix a small amount first. My first attempt looked too pale because wet color can be misleading. Let the sample cure before judging it.

Tip 3: Press the compound into the crack with a plastic spreader. Slightly overfill it. Tip 4: Level the surface before the compound hardens. A razor held nearly flat can remove excess material, but careless pressure may scratch polished marble. Tip 5: Blend the repair outward with progressively finer abrasive pads. Feather the edges gently. Tip 6: Match the surrounding vein rather than creating a perfectly uniform patch. Natural stone is rarely consistent. Tip 7: Allow full curing time, following the repair material’s technical data sheet. The Natural Stone Institute emphasizes clean, dry surfaces and manufacturer-directed procedures for stone maintenance. Do not rush. A final inspection under side lighting can reveal shallow dips, cloudy edges, or a color mismatch that needs correction.

Cure, Polish, and Prevent Future Marble Cracks

A crack in a marble vanity top needs more than a quick cosmetic patch. I begin by checking its length, depth, and location. Cracks near the sink, faucet, or edge may indicate movement underneath. Clean the area with a pH-neutral cleaner, then dry it completely. Never fill damp stone. Moisture can weaken the repair and leave a cloudy mark.

For a narrow, stable crack, use a suitable two-part marble repair resin or color-matched filler. Press it gently into the opening with a plastic spreader. Remove excess material before it hardens. Follow the curing time carefully. Rushing this step can make the patch soft or uneven. I have learned that perfect color matching is difficult, especially under warm bathroom lighting. Test the mixture on a hidden area first. Small mistakes become obvious after polishing.

After curing, wet-sand the repair with increasingly fine abrasive pads. Keep the surface level, and polish slowly to restore its soft reflection. Avoid acidic cleaners, rough powders, and excessive pressure. Seal the marble after polishing if the stone requires protection. Prevent future cracks by supporting the vanity properly, tightening fixtures gently, and keeping heavy objects away from unsupported edges. Use a tray under hot styling tools. Sudden temperature changes can stress marble. Check plumbing leaks regularly. A deeper or spreading crack deserves professional evaluation; disguising structural movement may only delay a larger repair.

FAQS

How should I inspect a crack in a marble vanity top?

Use a bright flashlight to trace the crack’s full length. Check its depth and location. Cracks near sinks, faucets, or edges may indicate movement underneath. Do not treat a spreading crack as merely cosmetic.

What materials are needed for a small marble crack repair?

Prepare a pH-neutral cleaner, soft brush, lint-free cloth, masking tape, and plastic spreader. Keep compatible two-part stone epoxy, mineral pigment, and fine abrasive pads ready. Ordinary household glue may yellow or shrink.

How should I prepare the marble before filling the crack?

Clean the surface gently and remove all residue. Let the stone dry completely. The area must be clean, dry, and stable. Never fill damp marble. Moisture can weaken the repair and create cloudy marks.

How can I match the repair color more accurately?

Mix a small amount of compatible pigment into the repair material. Test it on a hidden edge first. Warm vanity lighting can reveal slight differences. Perfect matching is difficult. I may misjudge it.

What is the safest way to apply the repair filler?

Press the filler gently into the crack with a plastic spreader. Apply thin layers instead of one thick bead. Remove excess material before it hardens. Wear gloves and eye protection during the work.

How long should the marble repair cure?

Follow the filler’s stated curing time carefully. Do not rush. A surface may look finished while remaining weak underneath. Inspect the crack again after curing. Movement or moisture may expose a deeper problem.

How should I sand and polish the repaired area?

Use wet sanding with increasingly fine abrasive pads. Keep the surface level and polish slowly. Restore the marble’s soft reflection without excessive pressure. Avoid acidic cleaners, rough powders, and dry dust spreading through the bathroom.

When should a professional evaluate the marble vanity top?

Seek professional evaluation when the crack spreads, returns, or appears near a supported joint. Deeper cracks may involve structural movement. Disguising that movement only delays a larger repair. That can become costly.

Conclusion

Repairing a cracked marble vanity top begins with careful assessment. Examine the crack’s length, depth, and location to determine whether it resulted from impact, structural movement, moisture, or natural weakness in the stone. Gather suitable tools and marble repair materials, such as gentle cleaners, lint-free cloths, protective gloves, a compatible repair compound, a small applicator, fine-grit abrasive pads, and polishing materials. Before making any repair, remove dust, residue, and standing moisture from the surface, then allow the area to dry completely.

To learn How to fix a crack in a marble vanity top, apply the repair compound gradually, pressing it into the crack without spreading excess material across the surrounding stone. Level the filled area carefully and blend its appearance with the marble as much as possible. Allow the repair to cure fully according to the material’s instructions before smoothing and polishing the surface. Finally, prevent future cracks by avoiding heavy impacts, supporting objects properly, wiping up moisture promptly, and addressing any movement or instability beneath the vanity.

Sophia

Sophia

Sophia is a dedicated marketing professional with an exceptional depth of knowledge about her company's products and services. With a keen understanding of market trends and customer needs, she crafts insightful blog posts that not only inform but also engage readers, enriching the company’s online......