Installing marble tiles on a shower wall can be a transformative project. It adds elegance and sophistication to your bathroom. However, many homeowners may hesitate due to its perceived difficulty. Understanding how to install marble tiles on a shower wall can make this task much more approachable.
Having a solid plan is essential before starting. Gather all necessary tools and materials. This helps avoid unnecessary delays. Many inexperienced installers underestimate the time required for preparation. Properly measuring and cutting tiles is crucial for a good fit. Mistakes here can lead to wasted materials and increased costs.
While doing it yourself is rewarding, it can be challenging. Sometimes, things may not go as expected. If the tiles don’t adhere properly, it can affect the entire project. Reflecting on your methods throughout the process is vital. It can help improve your technique and outcome. With patience and attention to detail, you can achieve a beautiful marble shower wall that elevates your space.
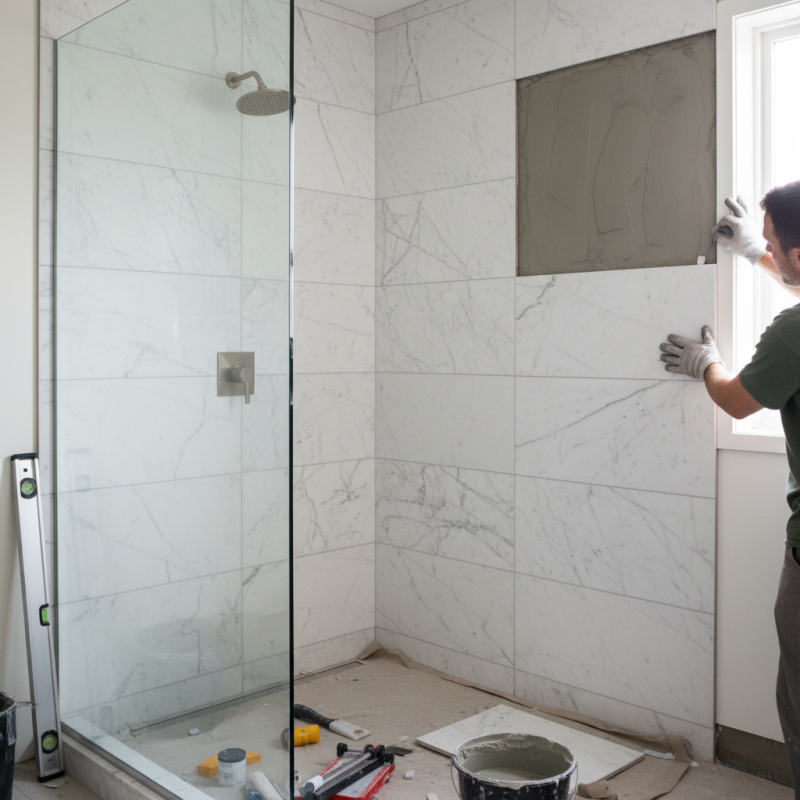
Installing marble tiles on a shower wall can elevate your bathroom's aesthetic. However, having the right tools and materials is essential to ensure a smooth installation process. Start with a tile cutter or wet saw. This tool is vital for making precise cuts. A trowel is also necessary for spreading adhesive evenly. A level is crucial to keep the tiles straight. Don't forget a rubber mallet to gently tap the tiles into place for a snug fit.
In addition to tools, quality materials are key. You will need thin-set mortar suitable for wet environments. Ensure that you use grout that is moisture-resistant. A sponge will help clean any excess grout from the tile surface. Remember, marble is porous, so a sealant is necessary to protect against stains and water damage. Each step of installation requires attention. Rushing can lead to misalignment and uneven surfaces.
Keep in mind, it's easy to overlook small details. Measure your wall accurately before cutting tiles. Small errors can cause major issues later. Not all tiles will fit perfectly, and that may lead to frustration. Patience is essential; taking the time to double-check may save you from unnecessary redo later on. Planning ahead and staying organized can significantly improve your tile installation experience.
Preparing the shower wall surface is crucial for tile adhesion. An uneven surface can lead to cracked tiles and uneven seams. Start by removing old tiles and existing adhesive. Experts recommend a clean substrate for optimal bonding. According to industry reports, a well-prepared surface can improve adhesion by up to 30%.
Next, inspect the wall for moisture issues. Use a moisture meter to check levels. High humidity can hinder tile adhesion. Address any leaks or mold before proceeding. If not managed, these issues could compromise the installation. In fact, data shows that 25% of tile failures are related to moisture problems.
After cleaning, use a leveling compound for any imperfections. This step helps create a smooth canvas for your marble tiles. Remember, rushing this preparation phase can lead to long-term problems. Taking the time to ensure your shower wall is properly prepared will enhance the durability and appearance of your tiles.
Measuring and cutting marble tiles for your shower wall requires precision. Start by measuring the dimensions of your shower wall. Use a level to ensure accurate measurements. Marble tiles come in various sizes. Knowing the exact area will help in selecting the right tile dimensions. Make sure to account for grout lines in your calculations. This step is crucial to achieve a polished look.
When cutting the marble tiles, use a wet saw for clean edges. It’s important to handle the tiles with care, as they can chip easily. Take your time to mark the cutting lines. A straightedge can help ensure accuracy. Remember that an imperfect cut can ruin the whole visual effect. Test-fit the tiles before permanently attaching them. This way, you can make adjustments if necessary.
Remember that working with marble can be challenging. Mistakes happen, so don’t rush the process. If a tile doesn’t fit perfectly, try repositioning it or adjusting your cuts. You could also consult with an expert if needed. Being patient will lead to a more professional result. Keep calm and focus on achieving the best possible fit.
To install marble tiles on a shower wall, proper adhesive application is crucial. Begin by selecting a high-quality thin-set mortar, which is often recommended for heavy tiles like marble. According to the Tile Council of North America (TCNA), proper adhesive selection can enhance the durability of tile installations. A well-prepared surface is essential. Ensure the wall is clean, dry, and smooth to allow the adhesive to bond effectively.
Next, apply the adhesive using a notched trowel. Hold the trowel at a 45-degree angle to create even ridges. These ridges maximize the bond surface between the tile and wall. The TCNA indicates that a coverage of 80% or more under each tile is ideal for a long-lasting installation. It can take time to achieve this, so patience is key. After laying the tiles, maintain consistent spacing with tile spacers to ensure uniform grout lines.
Marble installation can be unforgiving. Mistakes made in adhesive application or layout can lead to costly corrections later. Regularly check for alignment and flushness as you progress. Once installed, allow the tiles to cure as recommended, typically 24 to 48 hours, before grouting. By following these steps and remaining vigilant, you can create a stunning shower wall that withstands the test of time.
Grouting and sealing a marble shower wall is crucial for durability. Choose a high-quality grout suitable for wet areas. Apply it carefully between tiles using a grout float. Make sure to fill all gaps to prevent water seepage. Wipe away excess grout with a damp sponge, but avoid disturbing the joints. Let it cure for the time recommended by the grout manufacturer.
Sealing is equally important for the longevity of marble. A good sealer protects against moisture and stains. Apply the sealer evenly across the surface using a cloth or a brush. Pay attention to areas where water accumulates. Allow the sealer to dry as directed. Check for any missed spots before the final touch. Revisit your work after a few weeks to ensure everything is intact. It’s okay if things don’t look perfect right away. The key is to ensure your marble stays beautiful and functional. Regular maintenance will enhance its appearance over time.
| Step | Description | Tools Required | Estimated Time |
|---|---|---|---|
| 1 | Prepare the wall surface by cleaning and leveling. | Level, Cleaner, Trowel | 1 Hour |
| 2 | Mix and apply the thin-set mortar to the wall. | Mixing Bucket, Trowel | 30 Minutes |
| 3 | Install marble tiles starting from the bottom corner. | Marble Tiles, Spacers, Level | 3 Hours |
| 4 | Allow tiles to set for 24 hours. | N/A | 24 Hours |
| 5 | Grout the tiles and ensure even coverage. | Grout, Float, Sponge | 1 Hour |
| 6 | Seal the grout and tiles to protect from moisture. | Sealer, Applicator | 30 Minutes |
: Measure the dimensions carefully. Use a level for accurate results. Don’t forget to include grout lines.
A wet saw is essential for clean edges. Mark your cutting lines precisely for the best outcome.
Handle tiles with care to avoid chips. Take your time; rushing can lead to mistakes.
Choose a high-quality thin-set mortar for better bonding. A well-prepared surface is crucial for adhesion.
Aim for 80% coverage under each tile. This enhances durability and ensures a lasting installation.
Utilize tile spacers while installing. This helps ensure uniform grout lines across the entire installation.
Reposition the tile or adjust your cuts. Don't hesitate to rethink your approach if problems arise.
Tiles typically need 24 to 48 hours to cure. This waiting period is important before applying grout.
Mistakes can happen. Assess the error, and don’t rush to fix it. Take a moment to reflect on the best solution.
Patience allows for better precision. Quick decisions can lead to costly errors. Focus on achieving the best result.
In the article "How to Install Marble Tiles on a Shower Wall Easily," readers will gain insights into effectively transforming their shower space with elegant marble tiles. The process begins with understanding the essential tools and materials necessary for a successful installation. Preparing the shower wall surface is crucial, as it ensures optimal tile adhesion.
The next steps involve measuring and cutting the marble tiles to fit perfectly onto the wall. Following this, the article provides a detailed, step-by-step guide on applying adhesive and installing the tiles. Finally, the finishing touches include grouting and sealing the marble, which enhances durability and maintains the tiles' beauty. This comprehensive approach makes it easier for anyone to learn how to install marble tiles on a shower wall efficiently and elegantly.

Gem Marble