How to Grout Marble Tiles Correctly for a Stunning Finish?

Time:2026-07-08 Author:Amelia
0%

Grouting marble tiles can transform your space into a stunning masterpiece. However, it requires careful attention to detail. Knowing how to grout marble tiles correctly is essential for achieving a flawless finish. This process is not just about aesthetics; it ensures durability and longevity for your flooring.

When grouting, one common mistake is using too much water. This can lead to uneven color and a less polished look. Understanding the right consistency of grout is crucial. Moreover, the choice of grout color can dramatically affect the final appearance. Selecting a shade that complements your marble enhances its natural beauty.

Many DIY enthusiasts overlook the cleaning step. Residual grout on the tile surface can mar the elegance of marble. Proper cleanup requires patience and precision. Reflecting on these details can elevate your project from mediocre to breathtaking. Each step in grouting marble tiles is vital for lasting enjoyment of your beautiful floors.
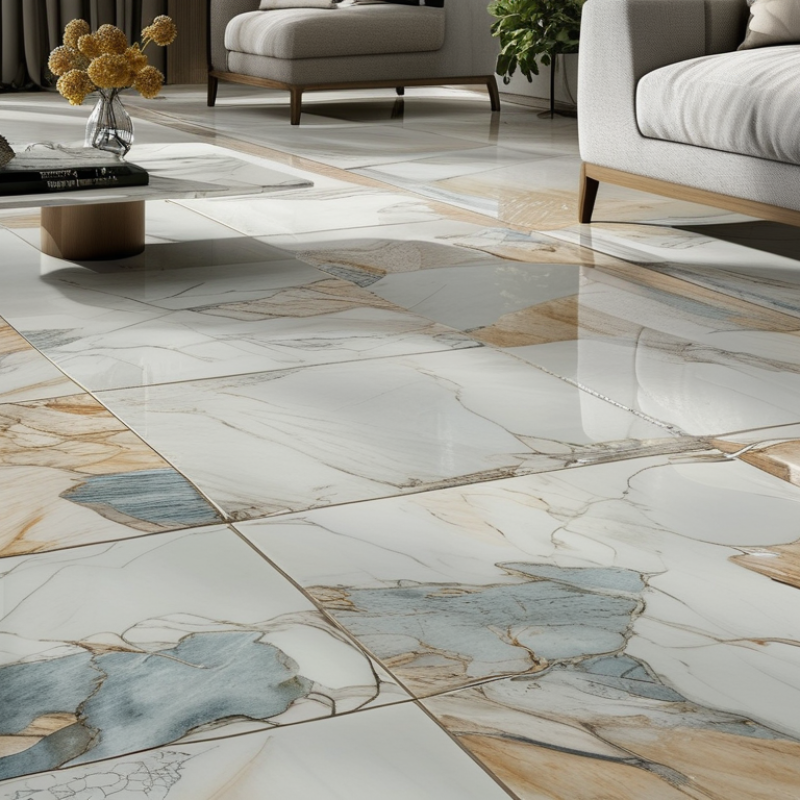
How to Grout Marble Tiles Correctly for a Stunning Finish?

Choosing the Right Grout for Marble Tiles

When choosing grout for marble tiles, it’s essential to prioritize both aesthetics and functionality. The right grout can enhance the natural beauty of marble while providing a durable finish. Consider using a sanded grout for larger joints, as it offers more strength. For smaller gaps, unsanded grout is a suitable choice. This type prevents scratching the delicate surface of marble.

Tips: Look for grout with a low shrinkage rate. This feature helps maintain a smooth finish without cracks. Ensure the color complements your marble tiles; a contrast may highlight the elegant veining. Remember to conduct a small test with your chosen grout. This ensures it pairs well with your tiles before full application.

Consider the overall moisture exposure your tiles will face. In wet areas, choose a grout that is resistant to mold and mildew. Some may need sealing to protect against stains. Keep in mind that the grout joint size can impact your installation. Wider joints might require more maintenance over time. Always reflect on your grout selection, as it can greatly affect your finished project.

Preparing the Surface Before Grouting

Preparing the surface before grouting marble tiles is crucial for achieving a stunning finish. A clean and smooth surface ensures the grout adheres properly. It’s essential to remove dust, dirt, and old adhesive residues. According to industry reports, improper surface preparation accounts for up to 25% of grout failures. This emphasizes the importance of taking time for preparation to avoid future issues.

Start by thoroughly vacuuming the tiled area. Follow this by wiping the tiles with a damp cloth. Make sure to inspect for any uneven tiles or gaps. If present, you should correct those issues before applying grout. Using a level can help identify any discrepancies in the tile surface, which is critical to a successful grouting process.

Tips: Use a quality grout float to apply grout evenly, and don't rush the drying process. Allow grout to cure according to manufacturer recommendations, typically between 24 to 72 hours. This waiting period is vital for long-lasting results. Be aware of humidity levels in your workspace, as they can affect drying time. Always prioritize preparation to avoid complications down the line.

How to Grout Marble Tiles Correctly for a Stunning Finish? - Preparing the Surface Before Grouting

Step Description Materials Needed Time Required
1 Clean the Surface Mop, Cleaner, Water 30 minutes
2 Inspect for Damage None 15 minutes
3 Apply Tape Painter's Tape 10 minutes
4 Mix Grout Grout, Water, Mixing Bucket 20 minutes
5 Apply Grout Grout Float 30 minutes
6 Clean Excess Grout Sponge, Water 20 minutes
7 Allow to Cure None 24 hours

Applying Grout to Marble Tiles: Step-by-Step Instructions

When applying grout to marble tiles, preparation is key. Begin by ensuring the tiles are clean and dry. Dust or debris can lead to uneven grout application. Use a vacuum or a damp cloth. After cleaning, mix the grout according to its instructions. The right consistency is crucial; it should be smooth but not too watery.

Begin the application using a rubber float. Press the grout into the seams firmly. Make sure to fill all gaps to prevent mold growth later. A common mistake is applying too much pressure, which may crack the tiles. If you notice excess grout on the tile surface, wipe it off quickly. Marble is porous; delayed cleaning can lead to staining.

After the grout has set for a short period, shape the joints with a damp sponge. This step requires a gentle touch; too much pressure can disrupt the fresh grout lines. Allow the grout to cure fully. This period may vary based on humidity and temperature. Check regularly for any cracks or shrinkage. If you encounter issues, consider reapplying. Grouting requires patience and precision for the best results.

Cleaning Excess Grout from Marble Surfaces

Cleaning excess grout from marble surfaces is essential for achieving a polished look. Grout can easily stain marble if not dealt with quickly. The first step is to wait for the grout to set for about 20 to 30 minutes. This allows it to harden, making it easier to remove without smearing.

Use a damp sponge to wipe off the excess grout. Make sure the sponge is not too wet, as excess water can also stain marble. Rinse the sponge often to prevent spreading grout residue. For stubborn grout lines, a plastic scraper can be helpful. Be gentle; harsh scrubbing can scratch the marble.

After initial cleaning, check for haze left on the surface. If you notice a cloudy appearance, a mixture of vinegar and water can help. Apply it lightly and wipe with a soft cloth. Remember, this step should be approached with caution. Excessive acidity can harm marble. Testing on a small area first is wise. Regularly inspect your marble tiles during this process to avoid long-term damage.

Sealing Grouted Marble Tiles for Longevity and Shine

Sealing grouted marble tiles is essential for enhancing their longevity and shine. This process creates a protective layer, preventing damage from moisture and stains. It’s crucial to choose a high-quality, penetrating sealer designed specifically for marble. Unlike other tiles, marble is porous. This means it absorbs liquids, which can lead to discoloration and etching over time.

Applying the sealer requires careful attention. Start with a clean surface, free from dust and debris. Use a soft cloth or brush to apply the sealer evenly. Make sure to cover all grout lines and tile surfaces. Avoid pooling, as this can create an uneven finish. It’s advisable to work in small sections, allowing for easier management and ensuring that the sealer penetrates effectively.

Consider the drying time specified by the sealer's manufacturer. Insufficient drying can lead to a dull appearance. Rushed jobs often result in incomplete sealing. Regular maintenance is vital. Reseal your marble tiles at least every year, or more frequently in high-use areas. Over time, you may notice signs of wear or discoloration. Addressing these issues promptly will help maintain the stunning look of your marble tiles.

Marble Tile Grout Durability and Maintenance Comparison

This chart compares the durability ratings of different types of grout used for marble tiles. It highlights the performance of unsanded, sanded, epoxy, and urethane grouts, which is crucial for ensuring a stunning finish and longevity of marble tile installations.

FAQS

: How should I prepare marble tiles before applying grout?

: Ensure the tiles are clean and dry. Use a vacuum or damp cloth to remove dust.

What should the consistency of the grout be?

The grout should be smooth but not watery. Mixing according to instructions is crucial.

How do I apply grout to the tiles?

Use a rubber float to press grout into seams. Fill all gaps to prevent mold growth.

What mistake should I avoid when applying grout?

Avoid applying too much pressure, as it may crack the tiles during application.

What should I do if there's excess grout on the tile surface?

Wipe it off quickly with a damp sponge to avoid staining the porous marble.

How do I shape the grout joints after application?

Use a damp sponge delicately. Be gentle to avoid disrupting the fresh grout lines.

How long should I allow the grout to cure?

The curing time may vary based on humidity and temperature. Regularly check for cracks.

What if I notice haze on the marble surface after cleaning grout?

Use a vinegar and water mixture gently. Always test on a small area first.

How can I clean stubborn grout lines from marble?

A plastic scraper can help, but be gentle. Harsh scrubbing may scratch the surface.

Why is it important to clean grout quickly?

Grout can stain marble if not removed promptly. Quick actions help maintain a polished look.

Conclusion

When considering "How to grout marble tiles correctly," it's essential to start with the right grout type that complements the marble while providing durability. Preparing the surface before grouting is a crucial step, ensuring that it is clean and ready for application. The actual grouting process involves a systematic approach: applying the grout in a consistent manner, ensuring it fills all the joints without leaving excess.

After grouting, cleaning any residual grout from the marble surface is vital to maintain its aesthetic appeal. Finally, sealing the grouted marble tiles enhances their shine and extends their longevity, protecting them from stains and damage. By following these steps, you can achieve a stunning finish that elevates the beauty of your marble tiles.

Amelia

Amelia

Amelia is a seasoned marketing professional with a wealth of expertise in our company’s core offerings. With an unwavering passion for driving growth and innovation, she plays a pivotal role in shaping our marketing strategies and enhancing brand visibility. A key aspect of her responsibilities......